iPad Screen recording options
Occasionally, there are times when we need to record the screen of the iPad. Traditionally, this has often been for creating tutorials, how to’s, etc. There are apps that students use that don’t export to the camera roll and this can be another reason for recording the screen.
If you use Airserver or Reflector on your laptop, you will probably be aware that you can record the screen. The red record button is a giveaway! For much of the time this will be a great way to capture pupil activities, especially when they are presenting.
Some popular classroom apps, for example Scratch Jnr and Adobe Voice, are fun and present beautifully in full screen mode, but there’s no option to export/share the projects to the camera roll.
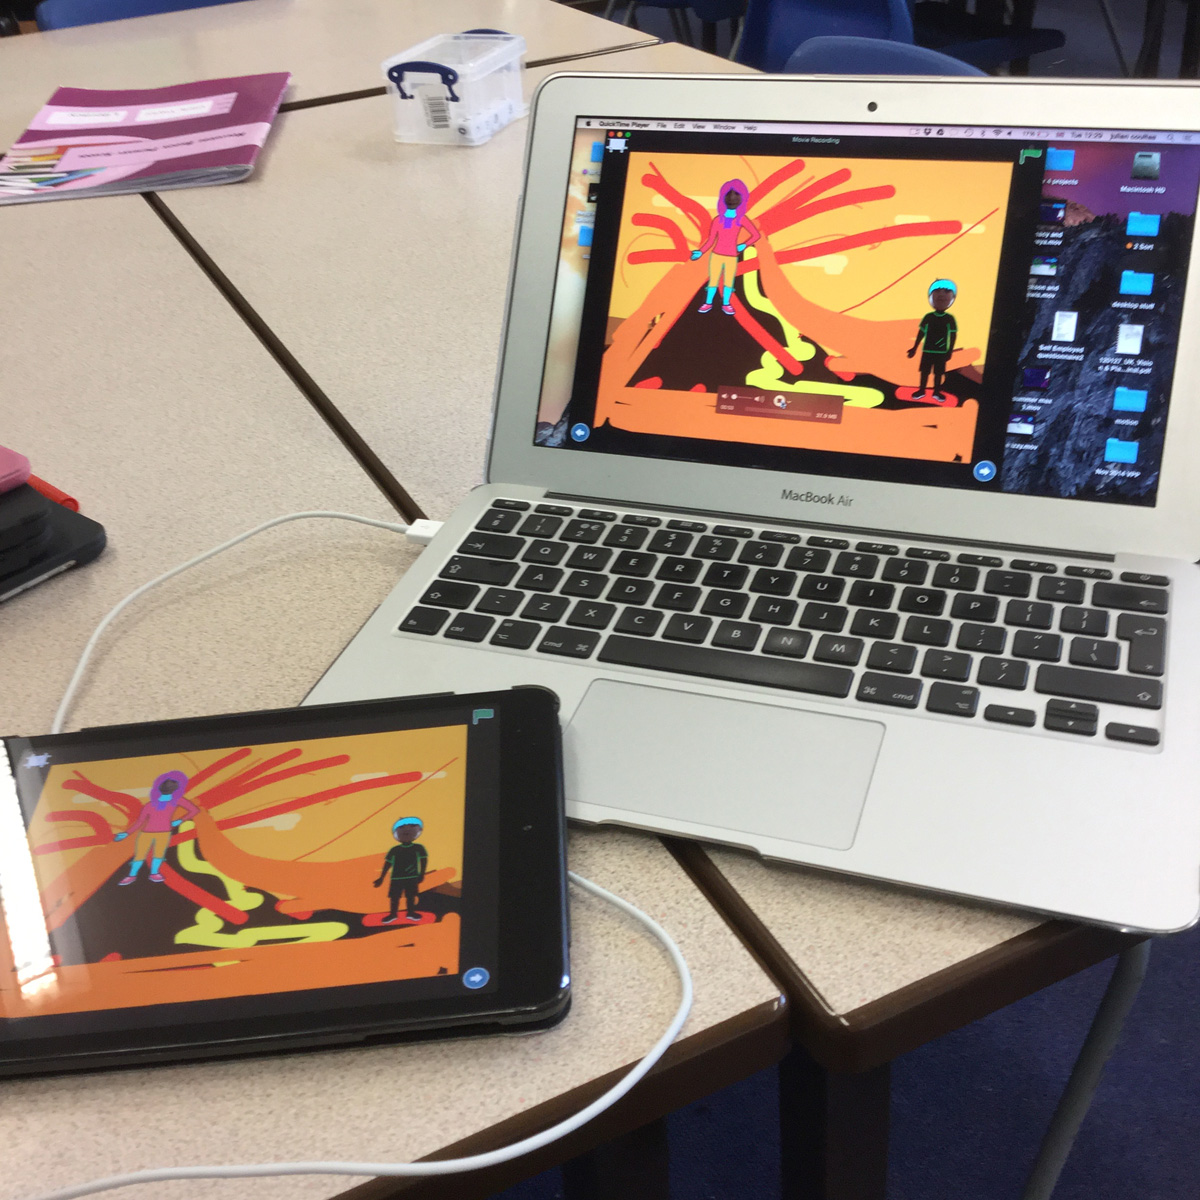
We can use Airserver and Reflector to record the mirrored student iPad; the file will be saved as a QuickTime movie on your computer. There are times, however, when the school wifi is just not fast enough and the mirrored recording is pixelated, or skips and even freezes.
With the advent of iOS 8, we now have a new option. We can record the iPad screen via the USB Cable. The advantage of this is that it is picture perfect and the files save in a fraction of the time taken using Reflector or Airserver. The hassle, of course, is the cable.
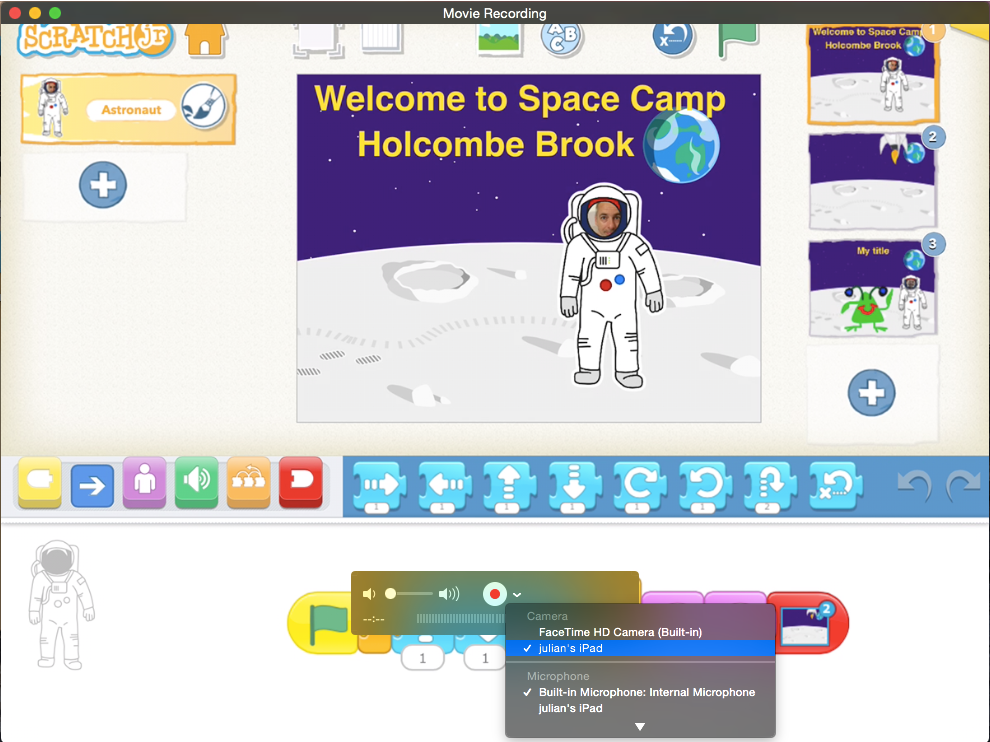
To record over USB, connect using a lightning cable. You may need to tap on the “trust this computer” message on your iPad. In QuickTime, select ‘Create new recording’ and select the iPad (from the drop down menu at the side of the mini timeline). Press the red button and you are recording the screen. Press again to stop. It really is that simple. So if your favourite “mirroring” app is struggling to cope with screen recording, the USB cable may just what you are looking for!
For pricing call us on 020 8351 5111 or email ku.oc.gnitupmocnacuot@selas